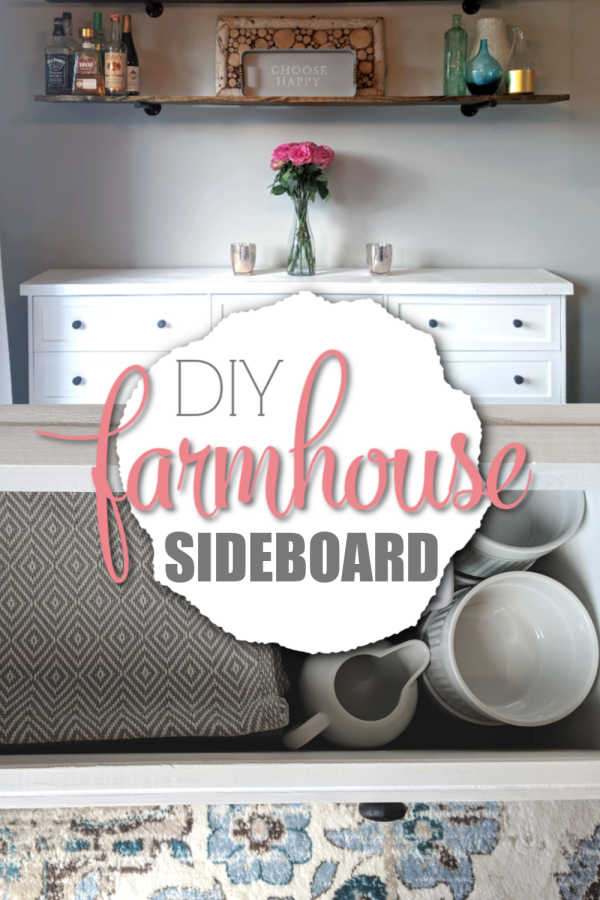
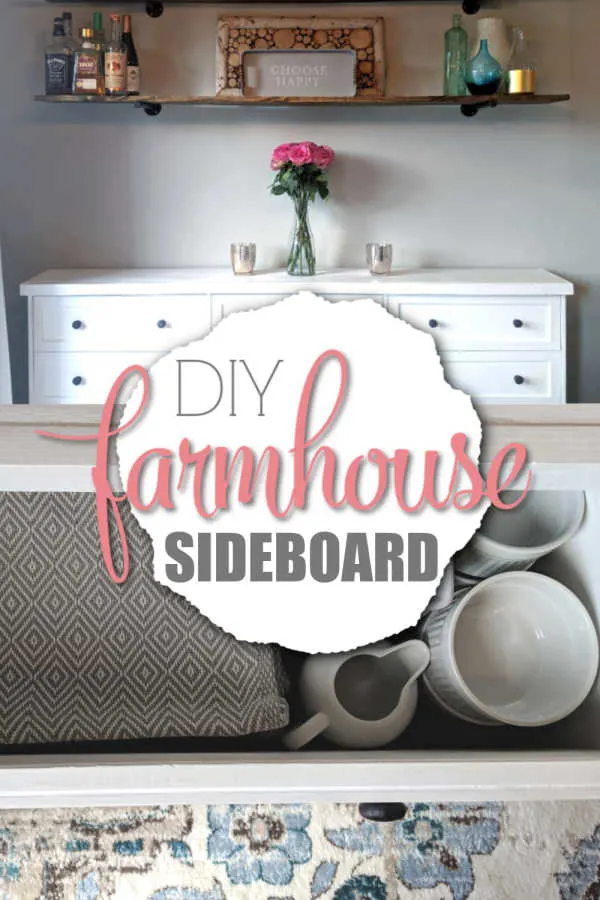
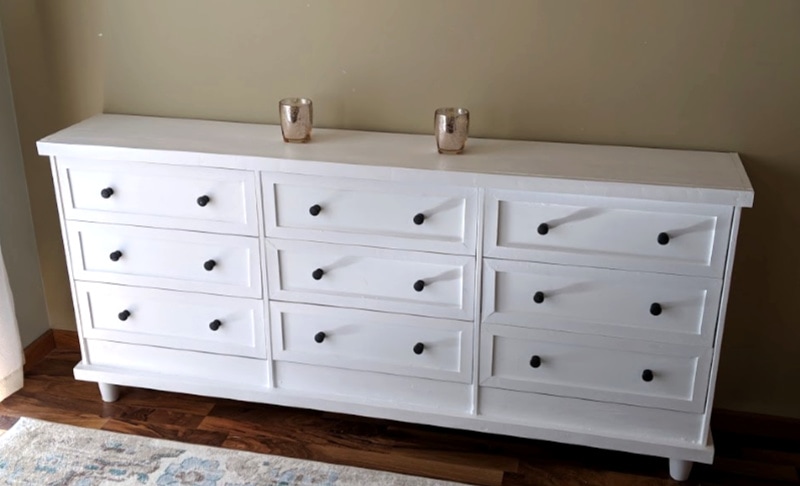
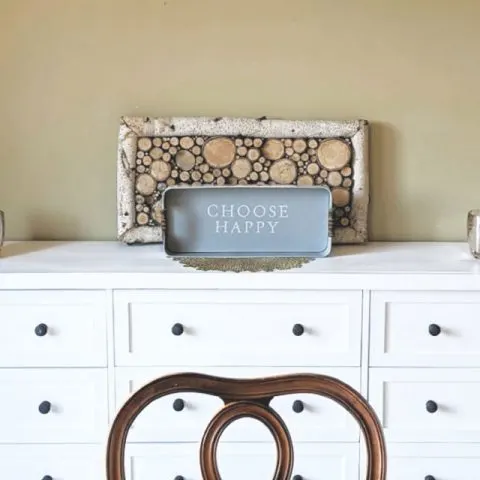
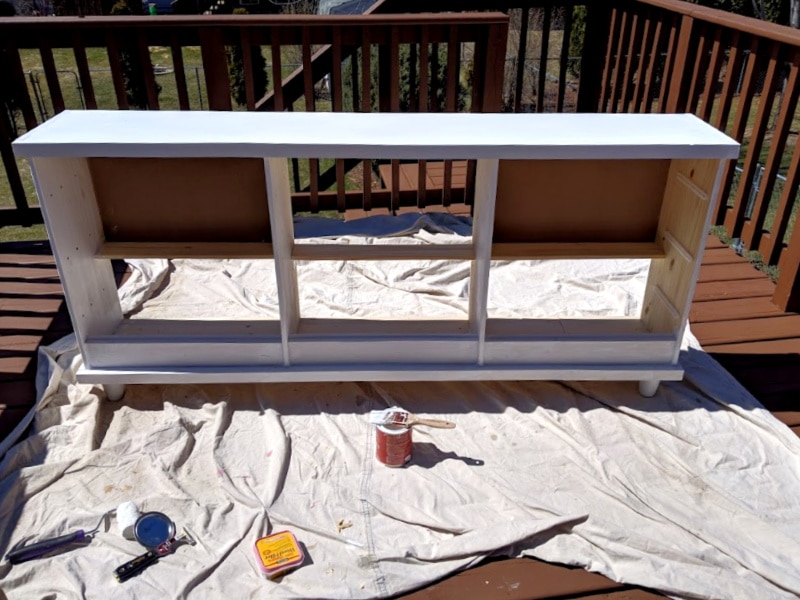
Don’t tell anyone, but this modern farmhouse sideboard is actually an Ikea hack! You wouldn’t know it by looking at it, but this cabinet is actually three Ikea Rast chests pieced together!
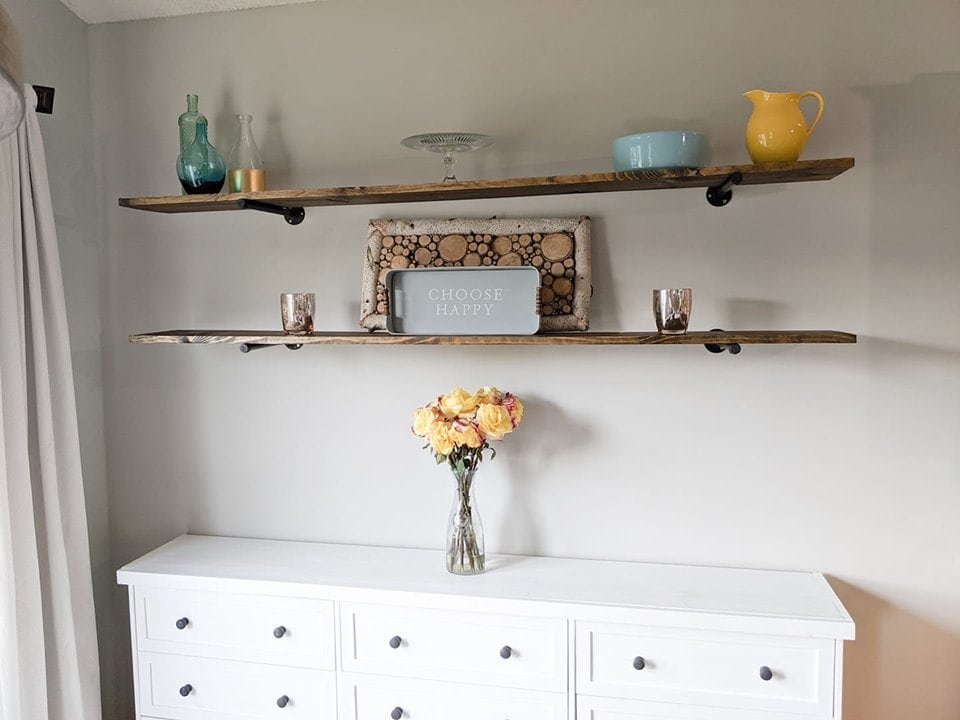
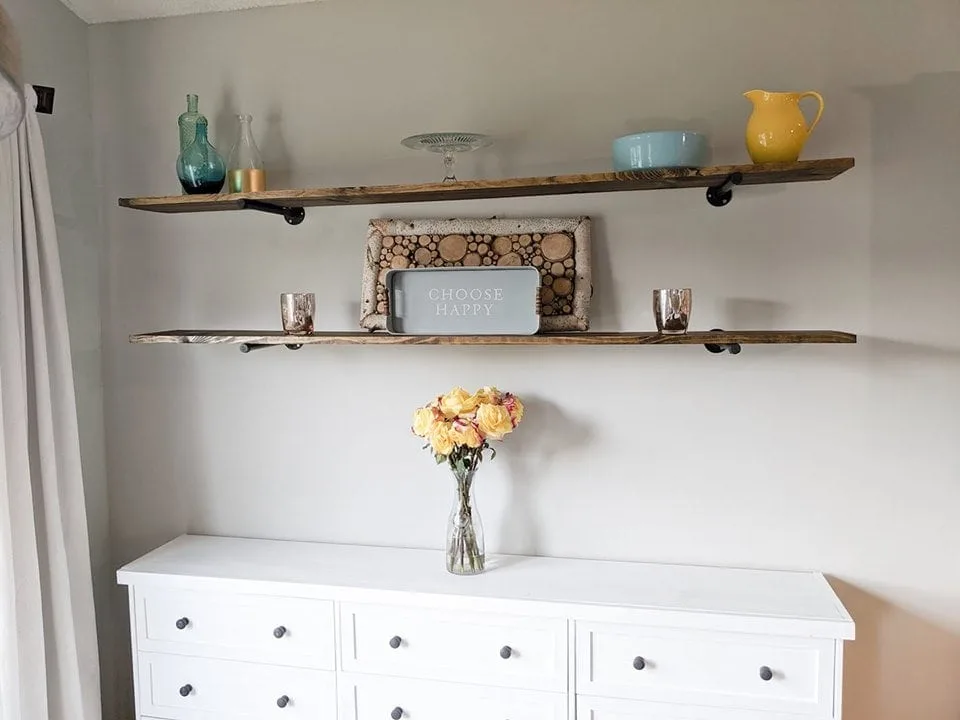
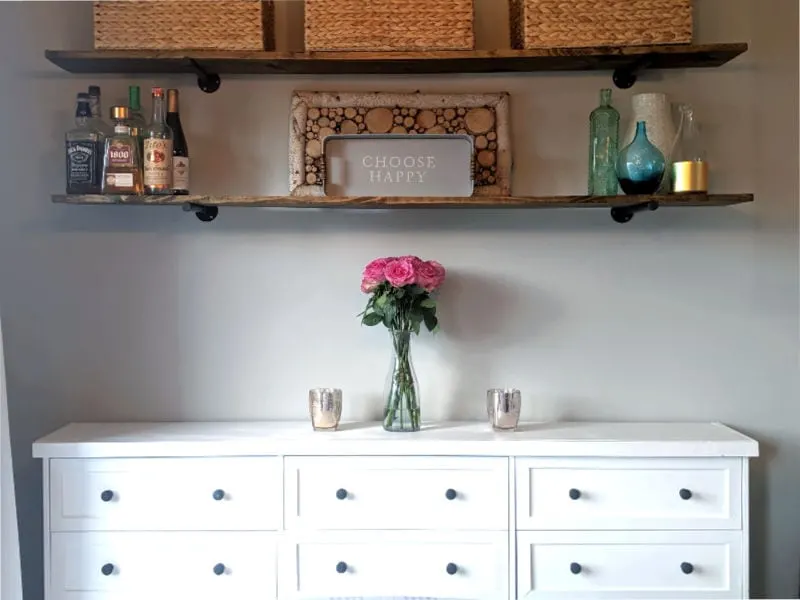
We also added some rustic pipe shelves that I am absolutely in love with! The stained wood shelves complement the painted wood buffet and add a beautiful deep contrast to the white sideboard (which we finished with milk paint).
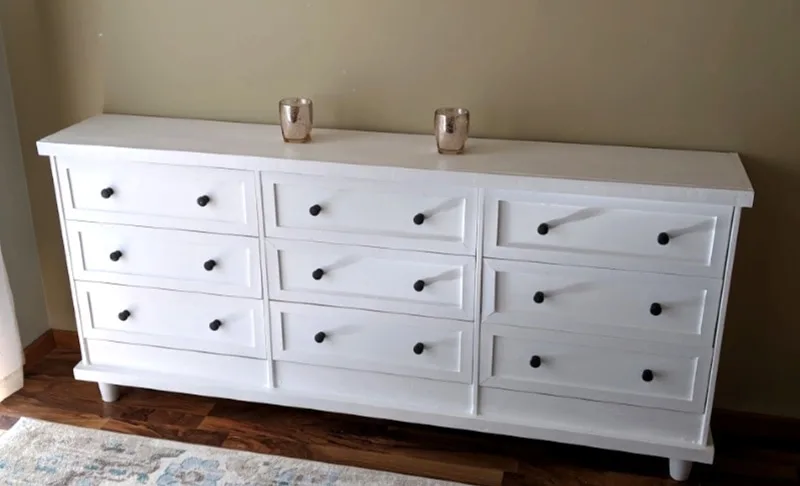
I was searching for the right white farmhouse style sideboard to buy for our kitchen/dining area and couldn’t find anything that I loved in the price range we could afford.
I wanted something that looked like a farmhouse dresser, but at the same time, functioned more like a rustic sideboard.

I didn’t want to spend thousands of dollars because we had just dropped a cool bundle buying the house, so the idea of spending a fortune on furniture had us both cringing.
PS: If you know the difference between a sideboard and a buffet cabinet, please let me know. I cannot figure it out. Truth be told, I didn’t really know what to call this piece because it really is in essence a farmhouse dresser (and could definitely be used for that purpose, but more on that later) but lives it’s life as a dining room storage unit and it seems to be perfectly content in it’s current role).
So I scoured the internet and came up with my inspiration: this Ikea Rast media console hack from In Between Chaos.
I immediately fell in love with the piece, even though it was too large for our space. It also was a little too low for a buffet or sideboard.
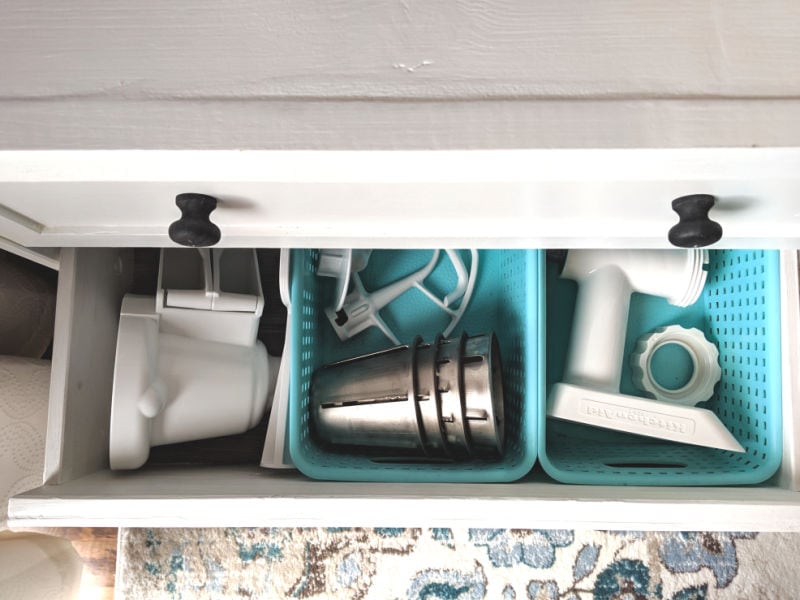
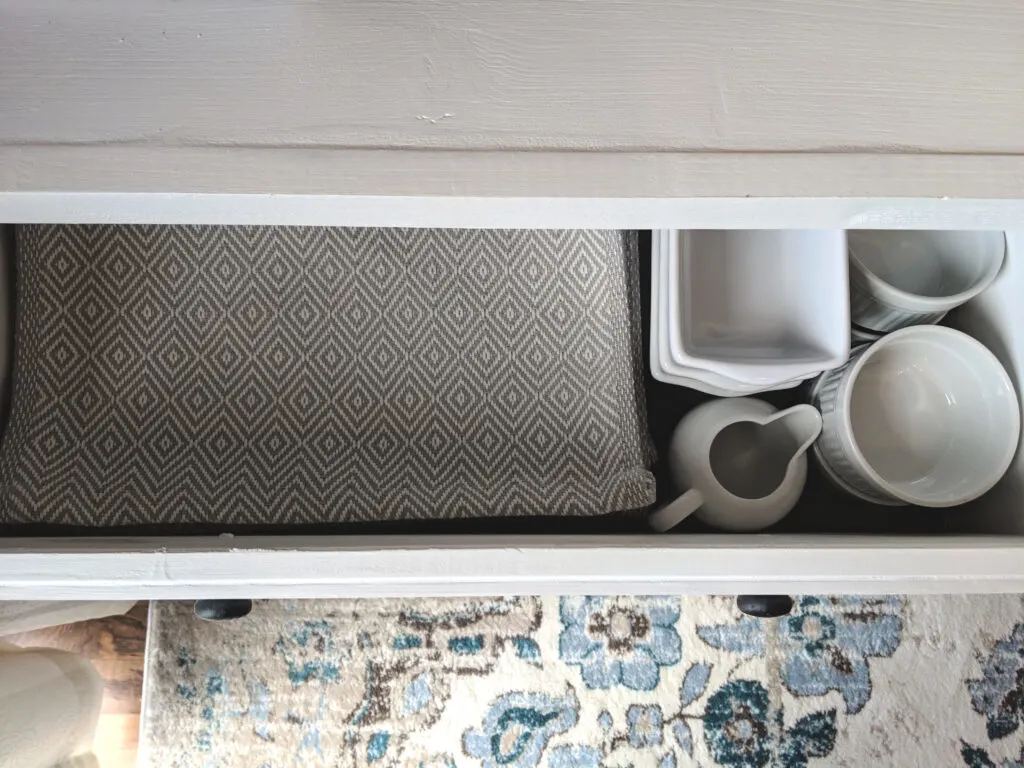
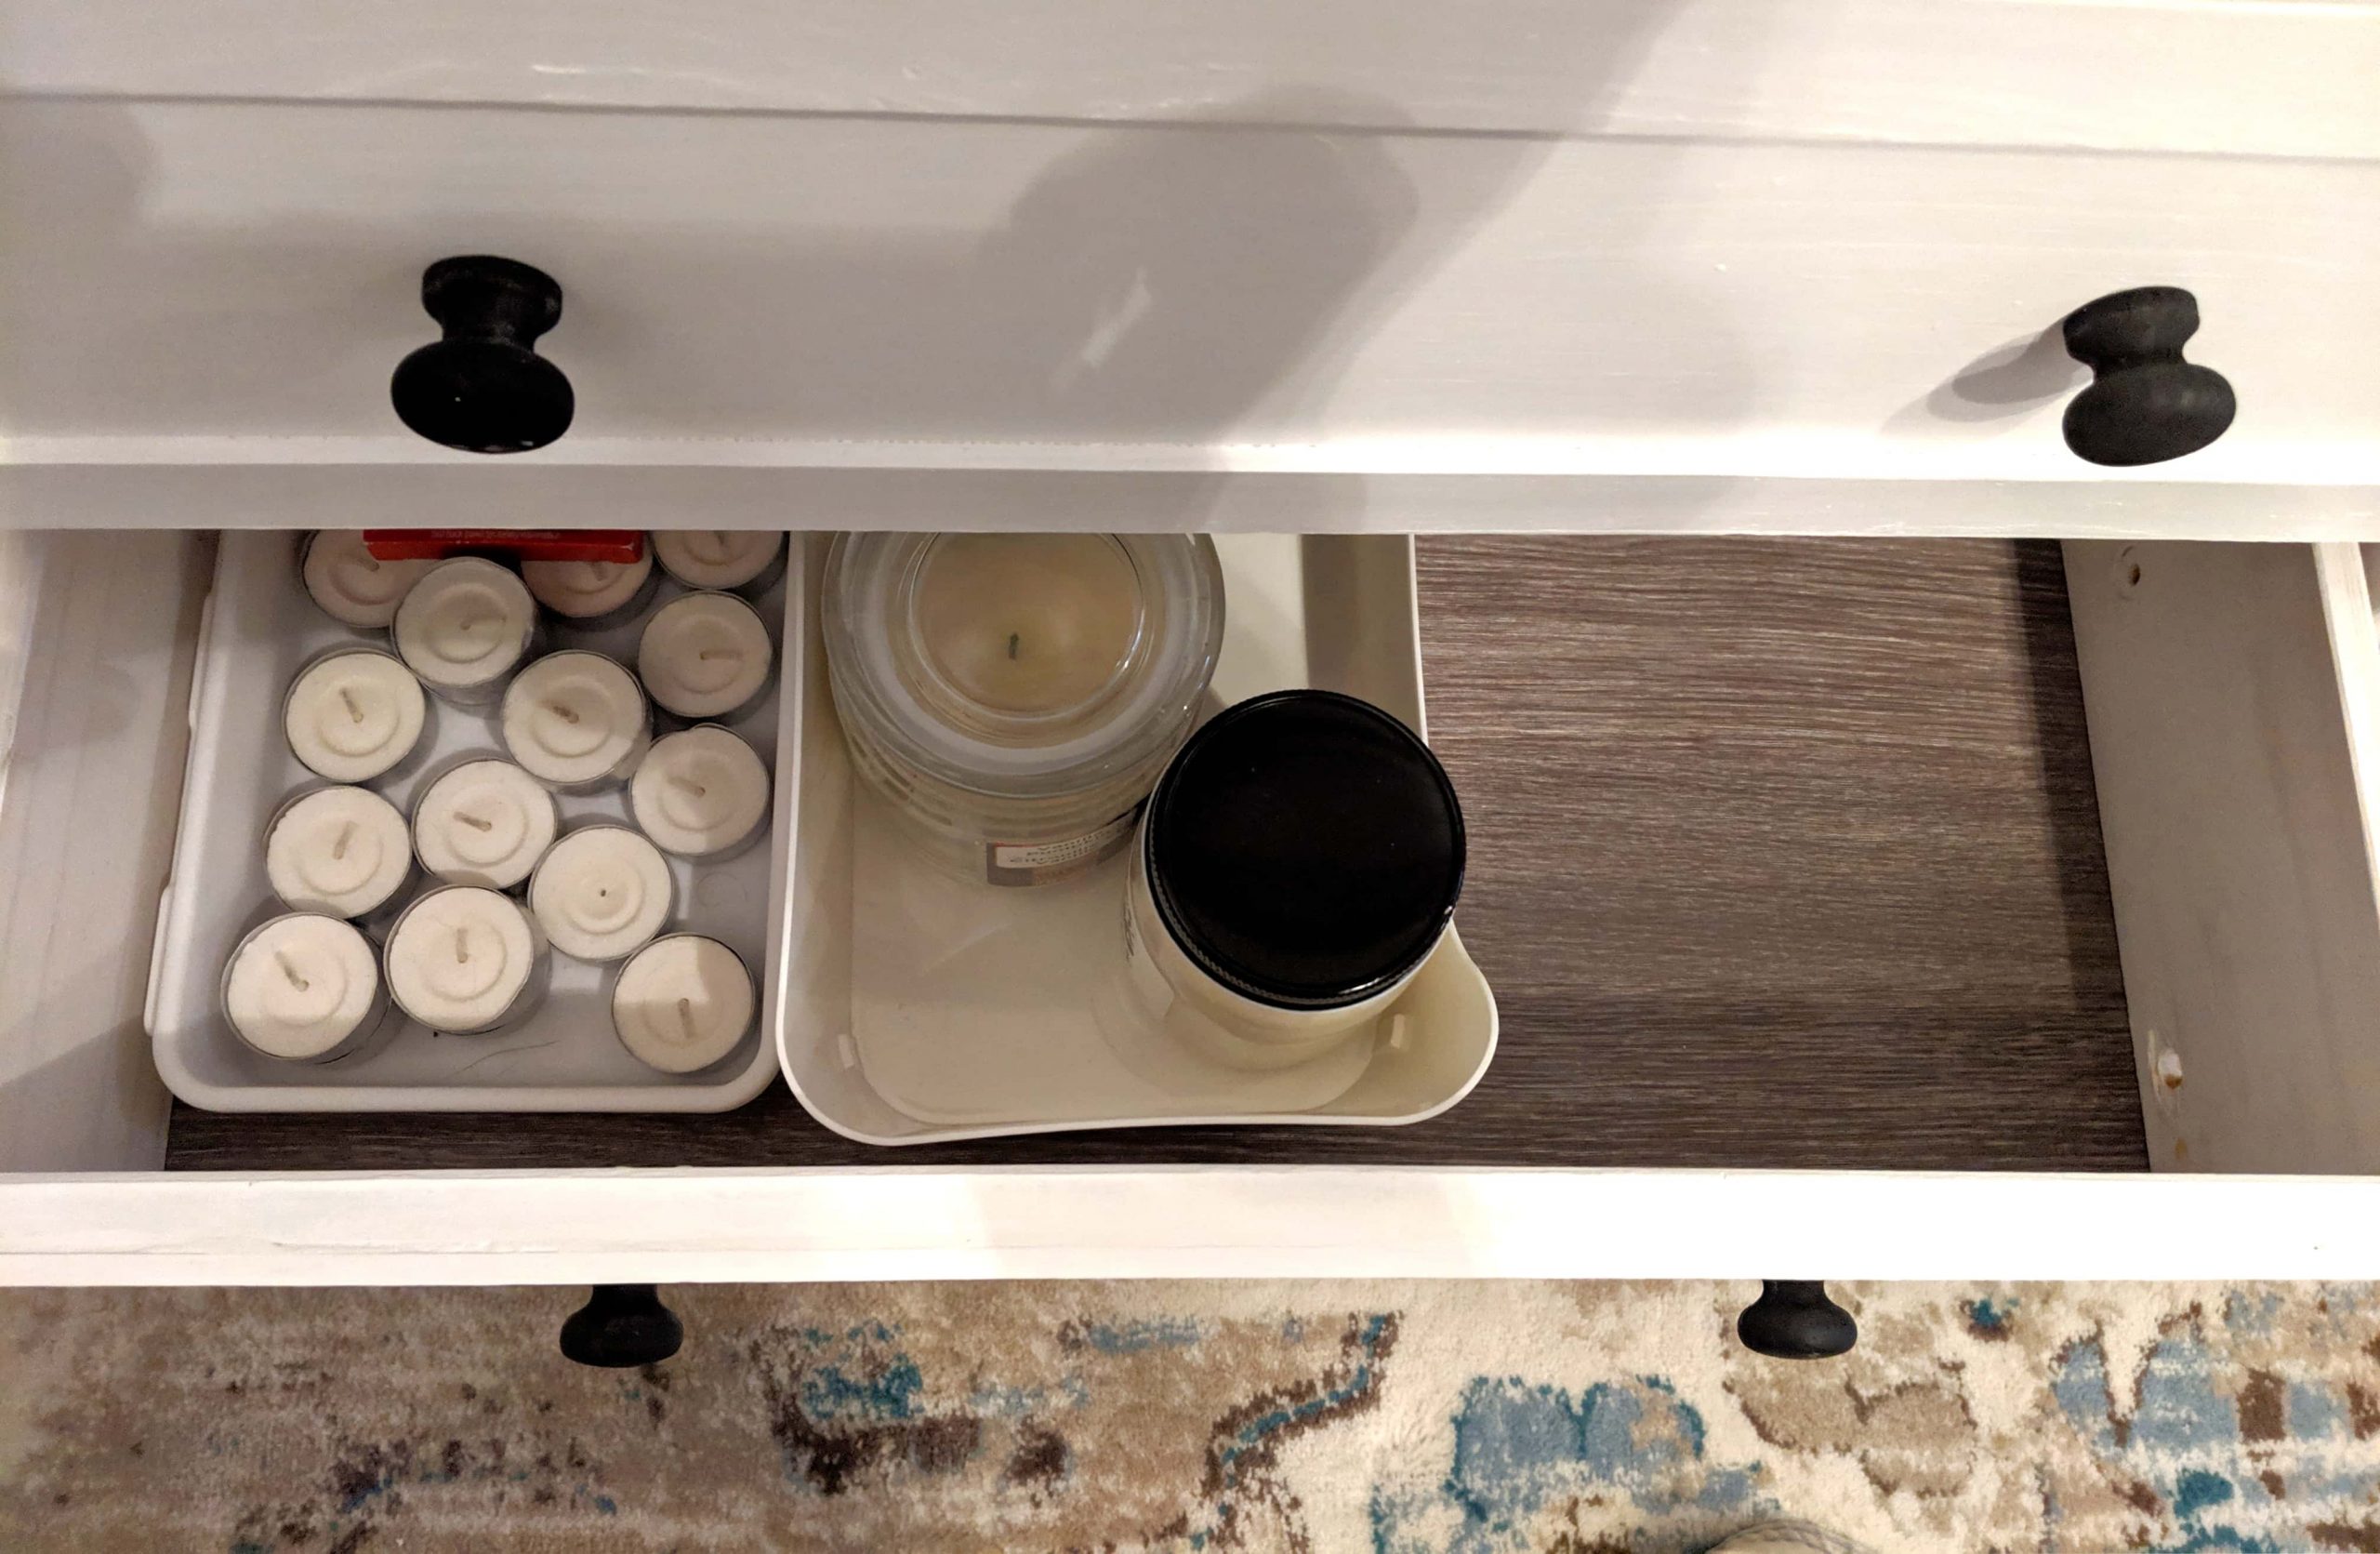
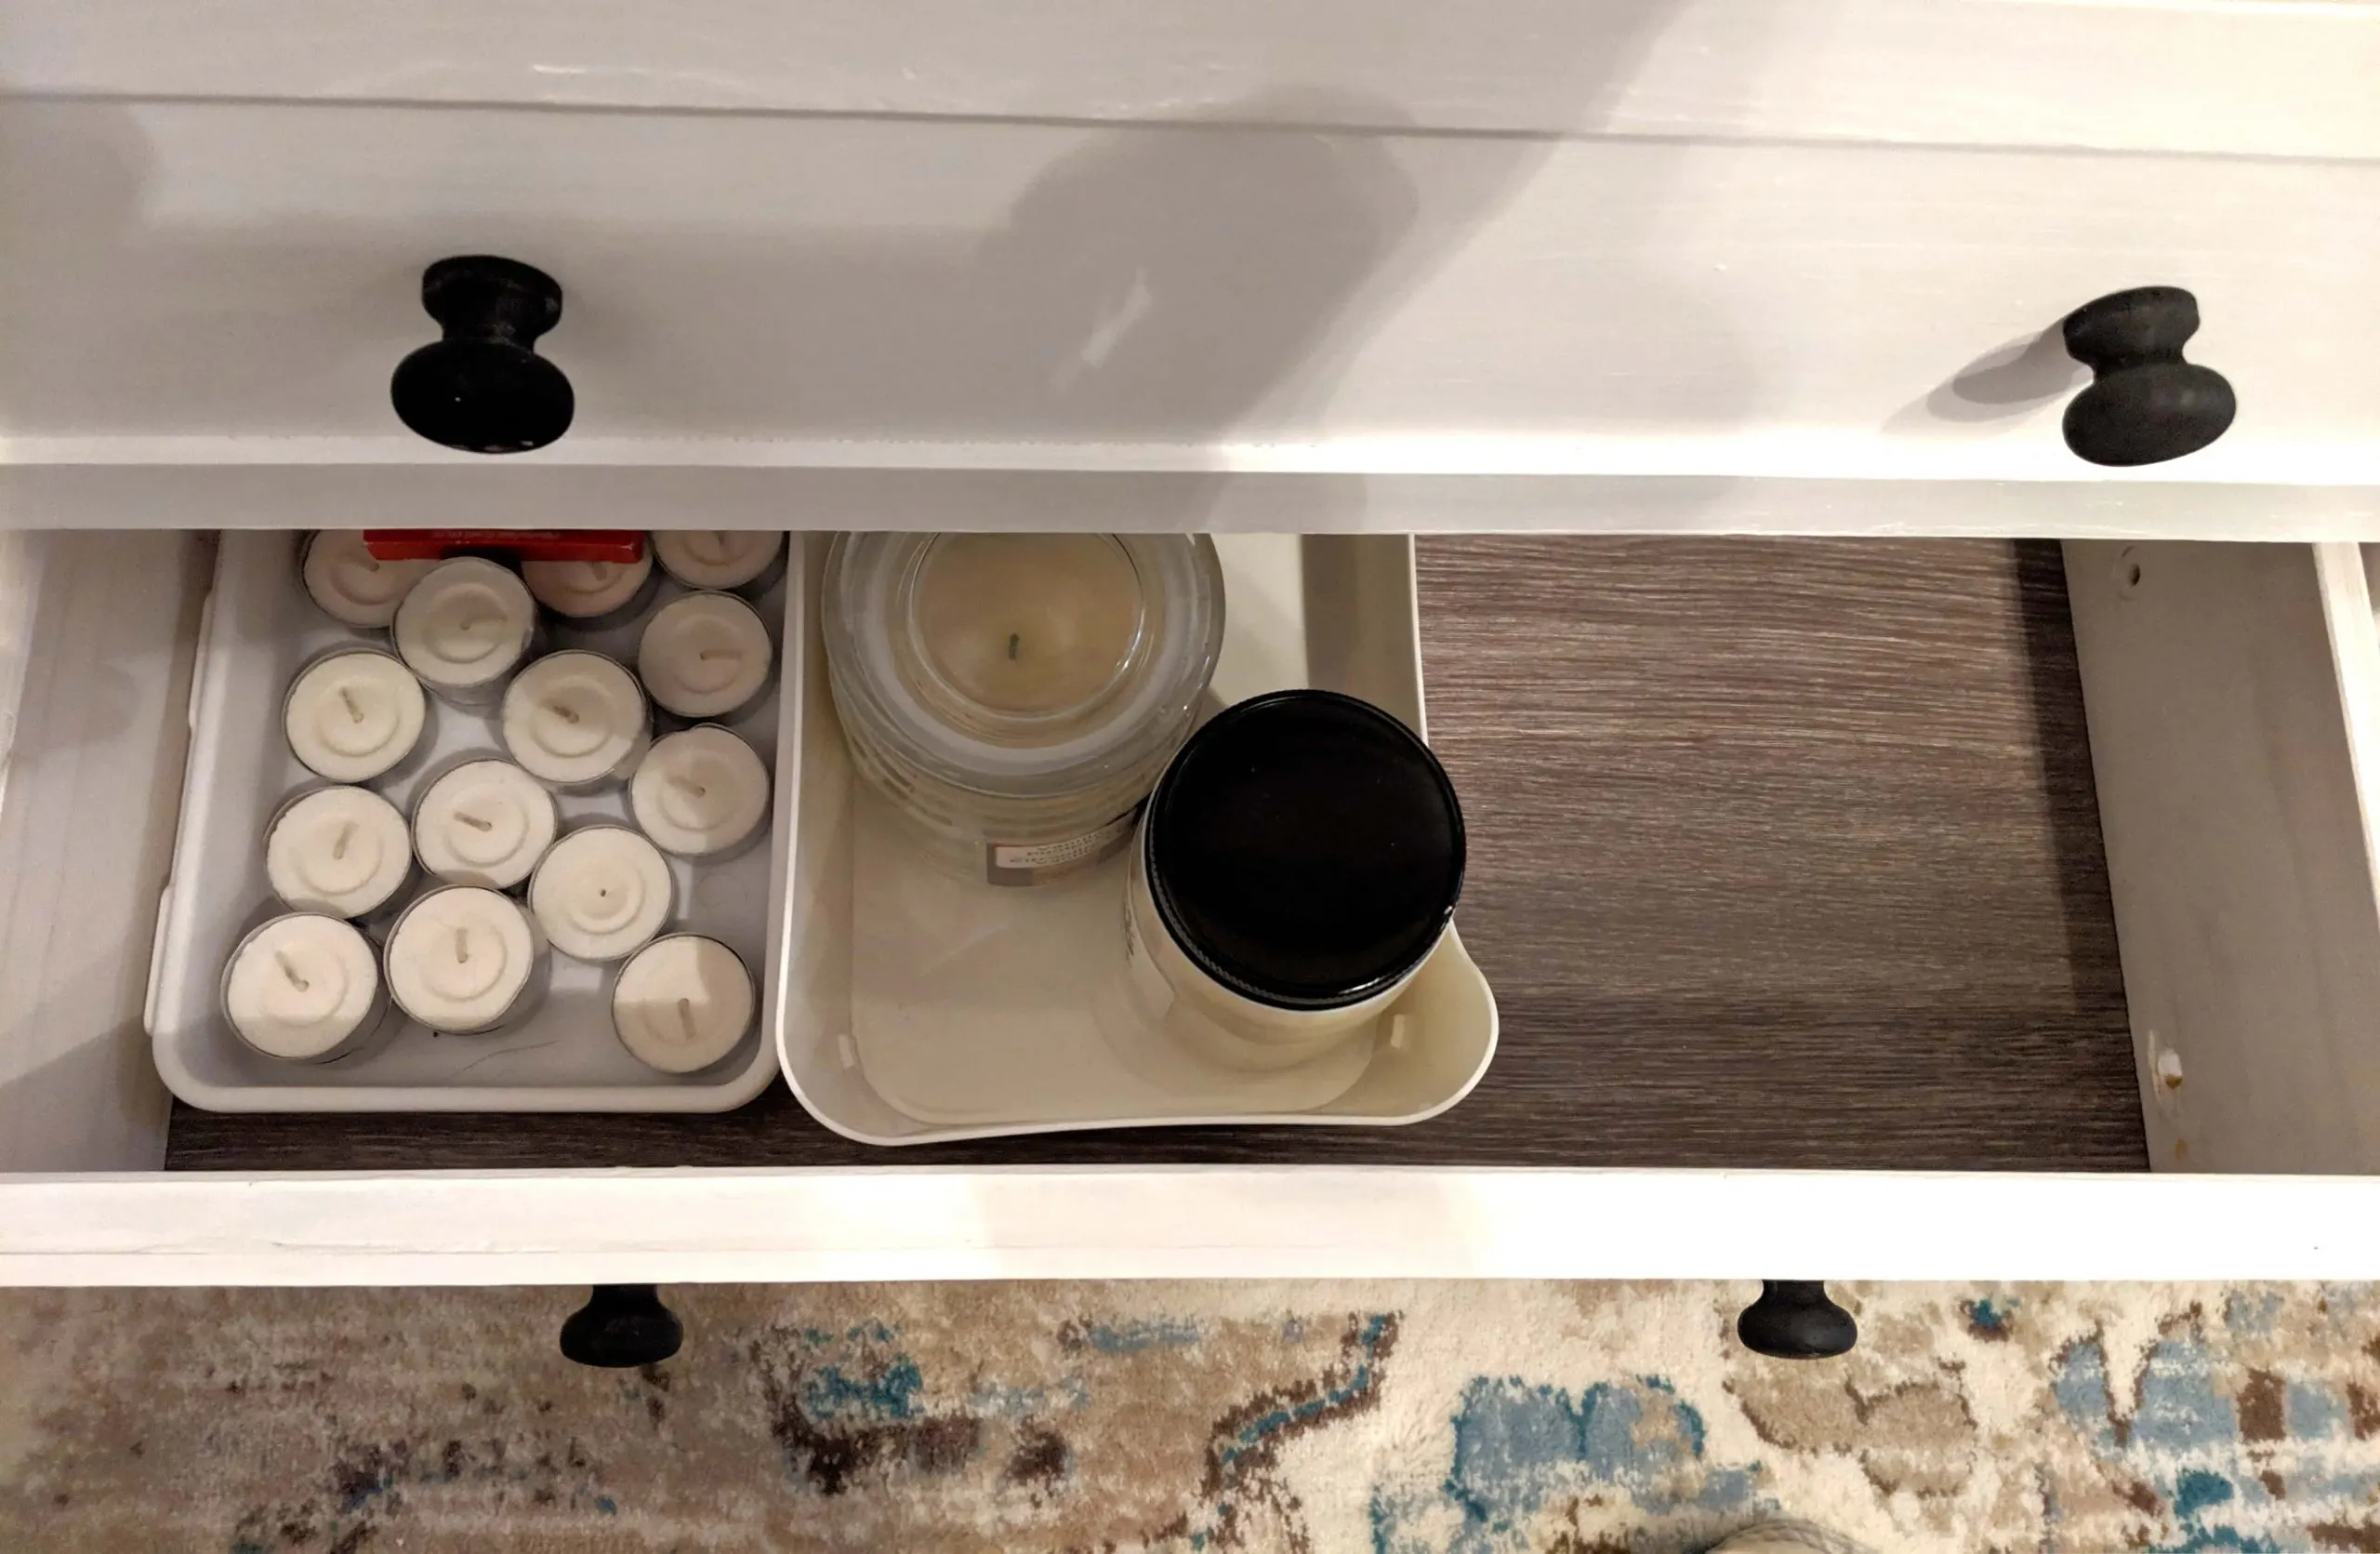
The piece in our home was going to have to be multi-functional. I needed something to hold a lot of our lesser-used kitchen implements: extra coffee mugs, specialty baking supplies, serving pieces, kitchen linens and even grill tools since it’s located right next to our patio door.

The hard part was that it also needed to be counter-height so that it could also act as a buffet table/ serving station when we have guests over for holidays.

I knew that the farmhouse media console piece had the look I wanted, but as it was designed in that post, it was too large for our space, and it was short: the Rast dressers are only 24 inches tall.
This post will cover all the basic assembly of the cabinet unit itself from Ikea parts, as well as all the customizations, trim and things we added to get the finished “farmhouse dresser” look, and to get it to the right height for our purposes.


I think someday we may invest in a real dining room hutch, but for now, we are loving our white sideboard that we made ourselves! We have even said that it would make a great dresser in our guest room someday if we do replace it for the current purpose.
What else can you do with this rustic sideboard?
If you don’t need a white buffet cabinet, you can paint this any color obviously. But what if you don’t need a buffet cabinet at all?


I think this shaker sideboard design (or the original one linked above) would both be awesome for a number of uses:
- farmhouse dresser (the drawers are a little shallow, but would be good for a guest or child’s room)
- farmhouse tv stand
- farmhouse media console
- rustic entry cabinet (one of those great foyer catch-alls for mittens, bags, keys, etc.)
What do you need to build this DIY sideboard?
- 3 Ikea Rast dressers
- 4 – 2″ metal corner braces
- 5 – wood legs
- 1 – 6′ glued edge board
- 1 x 2″
- 1 x 3″
- 1 1/2″ lattice
- 2 – 1 x 12 x 6′ boards
- hammer
- 2″ wood screws
- 2″ finishing nails
- power drill ( we love this one )
- wood glue
- clamps
- sander
- miter saw
- finish of choice (we chose milk paint)
Rustic Sideboard Plans:

How to Make a DIY Rustic Sideboard
This gorgeous farmhouse style white sideboard buffet piece is actually a cleverly disguised Ikea hack! Great project for a novice woodworker.
Materials
- 3 - Ikea Rast dressers
- 6 - 2" metal corner brackets
- 5 - wood legs
- 1 -1"x 12" x 6' glued edge board
- 3 - 1"x 2" x 8' pine
- 6 - 1 1/2" x 1/4" x 8' lattice trim
- 1 - 1" x 12" x 6' board
- 1 - 1" x 4" x 8' board
- 2" wood screws
- 1 1/2" finishing nails
- 3/4" wire nails
- wood glue
- finish of choice
- self adhesive drawer liner (optional)
Tools
- hammer
- power drill and bits
- clamps
- sander
- miter saw
- tape measure
- straight edge
Instructions
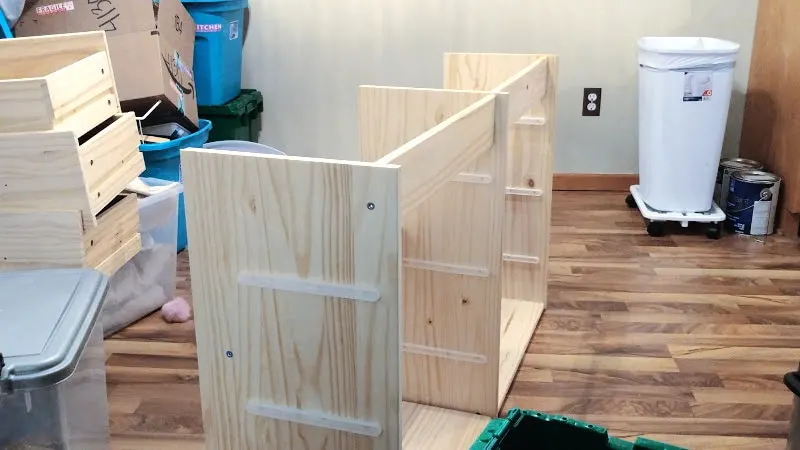
- Take the side panels of the Rast dressers, and drill the existing holes for the drawer slides so that they go all the way through the wood on 2 of the side panels. (You should have 2 with holes going all the way through and two that have holes on one side only. Save the remaining panels for another project.


- Assemble 1 of the Rast dressers according to Ikea's instructions, skipping the knob step for now. The left side panel of this dresser should have holes on the inside only, the right side panel should have holes going all the way through.
- Assemble the second Rast dresser without the left side panel, skipping the knob step for now.

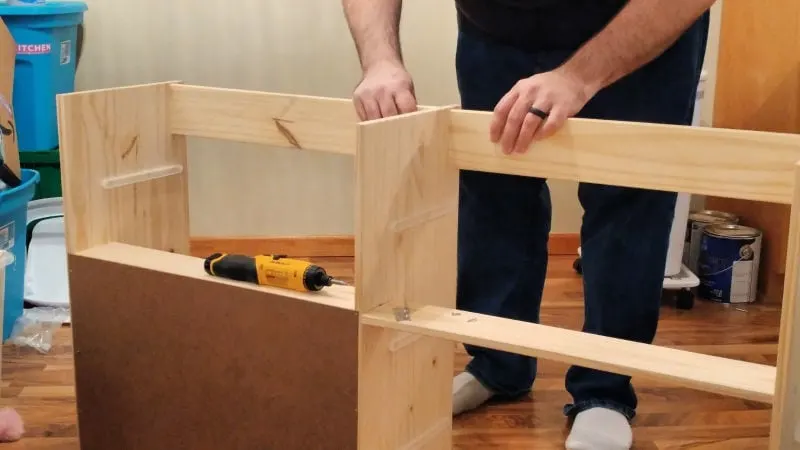
- Attach the second Rast dresser to the first, using three metal brackets. One should attach the top of the second dresser to the right side panel of the first dresser. One should attach the middle back support of the second dresser to the right side panel of the first dresser. The final bracket should attach the stabilizing board on the front of the second dresser to the right side panel of the first dresser.
- Assemble the third Rast dresser according to the instructions, skipping the knob step. The left side panel of this dresser should have holes all the way through, and the right side panel of this dresser should have holes on the inside only.
- Repeat step 4, securing the left side panel of the third dresser to the top of the second one, and so forth.

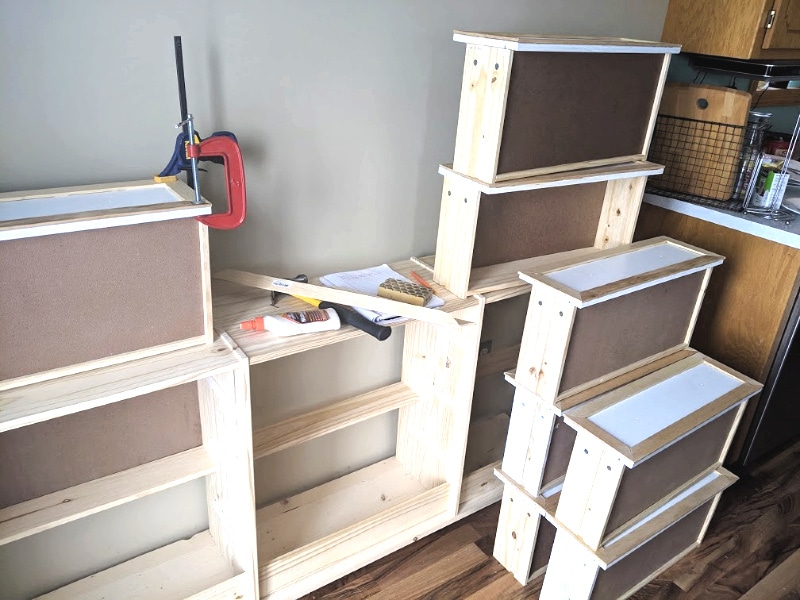
- Measure and cut the trim for drawer fronts using miter saw to cut the edges at a 45 degree angle. Using wood glue and clamps, glue the trim to the drawer fronts. Hammer in 3/4" wire nails to secure.

- Using wood screws, secure the glued edge board to the top of the cabinet.
- Using wood screws, secure the 1" x 12" x 6' board to the bottom of the cabinet as a base for the legs.
- Add the legs, one just inside each corner, and one in the center of the bottom of the cabinet for support.
- Measure and cut trim for front and sides for both top and bottom from the 1" x 2" wood. Secure using wood glue and 1 1/2" finishing nails.
- Measure and cut front filler pieces from the 1" x 4" board to cover the gaps in the base of the cabinet below the drawers. Secure to the front of the cabinet using 2" wood screws (these may stick out the back, so you can use smaller screws, I didn't have any on hand).
- Cover all screw/nail holes with wood filler. Fill in the gaps around the trim on the cabinet and drawer fronts with wood filler.
- Sand the whole thing down when the putty is dry
- Paint or stain as you wish. We used General Finishes Milk Paint in Snow White and really love how it turned out!

- Paint knobs - for this step you can use whatever paint or finish you wish. We went with a basic matte black paint, but you can jazz it up, or even purchase decorative knobs if you choose.
- Attach knobs, using extra care because these wood knobs split in half on me when drilling.
- If you like, you can add a self-adhesive drawer liner. I chose a gray barnwood drawer liner (similar linked below) to line the inside of the drawer bottoms, but a colorful one would be fun too!
- Insert drawer guides into holes, then insert drawers into the cabinet
- Secure to wall using the included Ikea tip over restraints. This step is important, even though we added a base and legs, the drawers can cause the cabinet to tip over, so PLEASE mount this to your wall for safety!
Notes
I didn't actually track the assembly time for this as we took our time over the course of a few weeks (okay...months) because there were other things that needed our attention and time, like unpacking our new house. So this assembly time might be way off compared to your experience. Let me know if you attempt how long it actually took start to finish! I'd be interested to hear how it goes for other people!
Drying time is going to vary depending on the type and brand of finishes selected.
Make sure you mount securely to the wall using the included Ikea wall restraints. Load heaviest items in the lower drawers.
Recommended Products
As an Amazon Associate and member of other affiliate programs, I earn from qualifying purchases.